There are two ways to create OAuth Sources via the Airbyte API.
- Use Airbyte credentials to authenticate OAuth Sources.
- Bring your own credentials to authenticate OAuth Sources using a Workspace OAuth credential override.
1. Use Airbyte credentials to authenticate
(click image to expand)
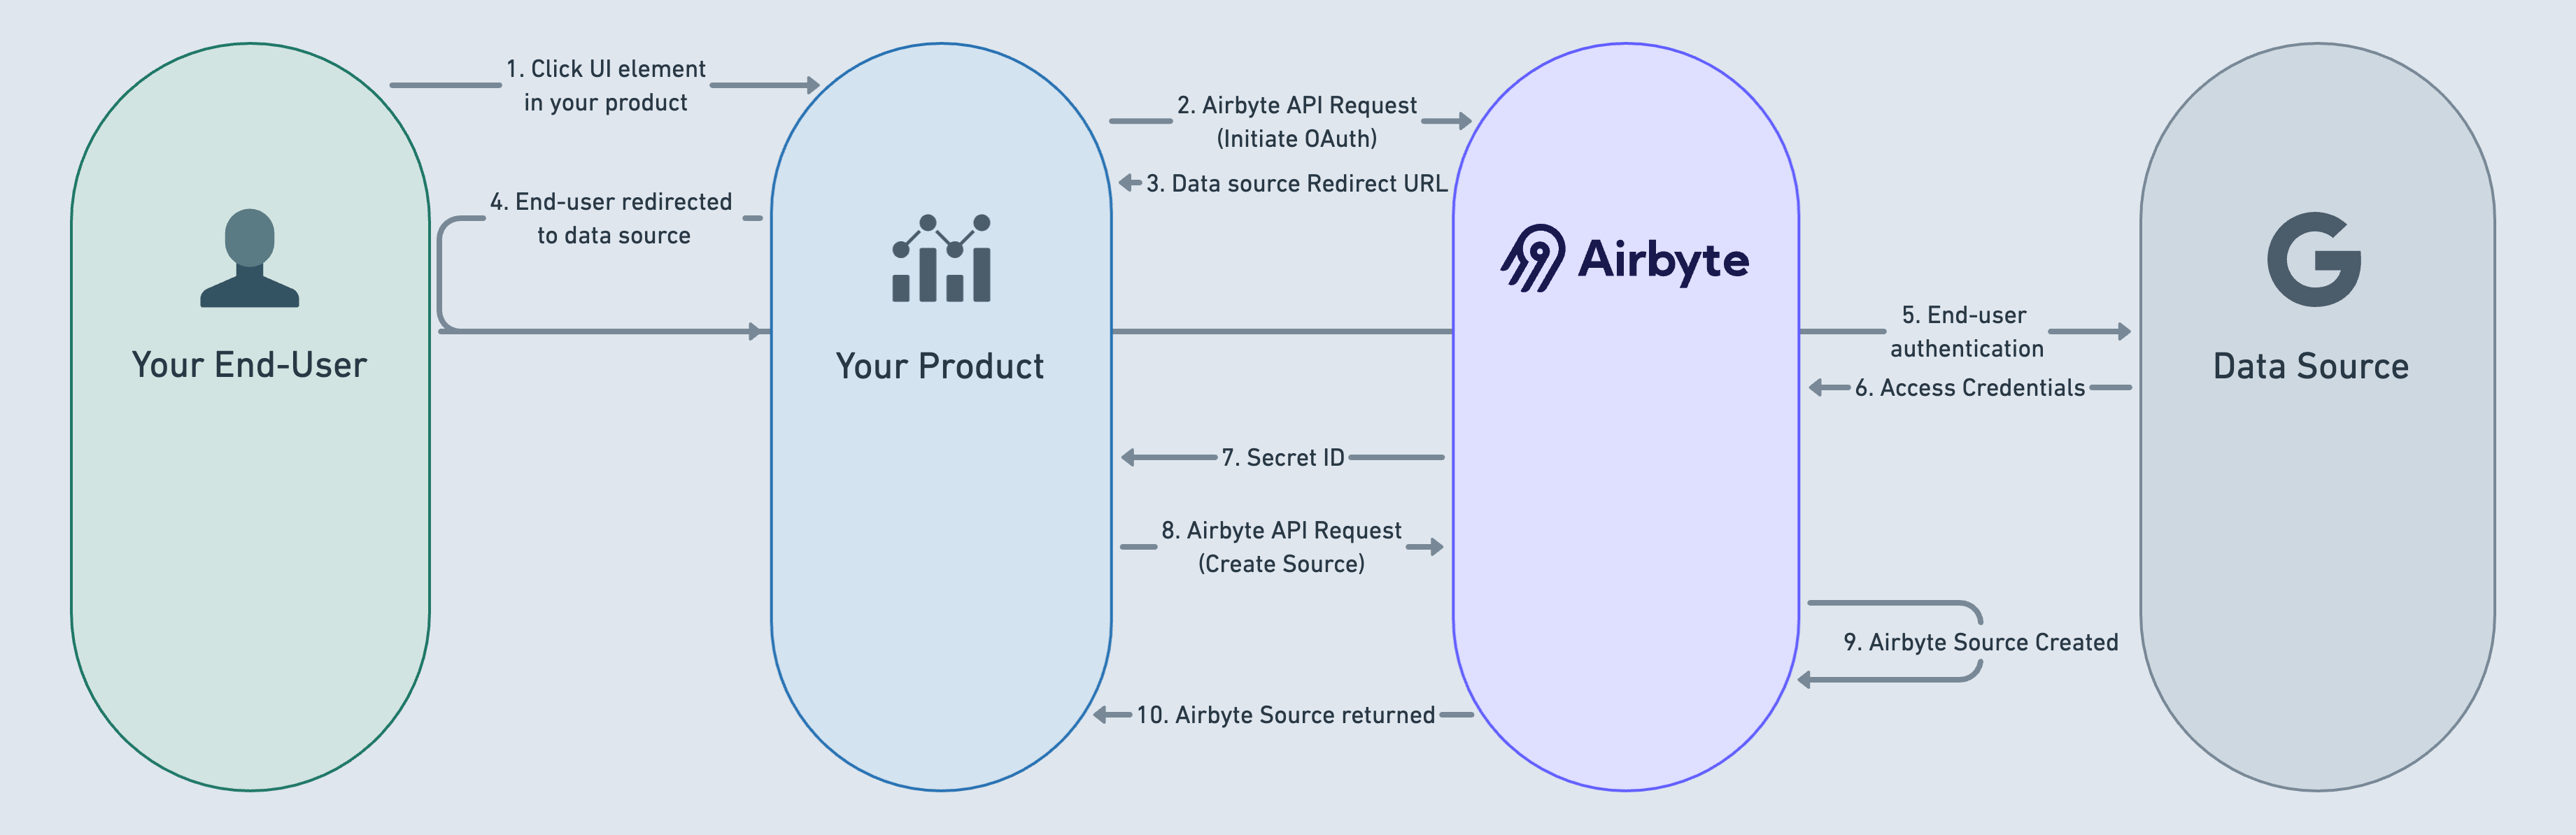
Initiate Source OAuth
A user clicks a UI element in your product (step #1 above). An example could be a button titled "Integrate Google Ads account". Your product then executes an API request to the initiateOAuth endpoint (step #2). A valid redirect URL must be included in the request body. This redirect URL corresponds to a route in your product which can receive a query string parameter containing a secret ID. After executing this API request, a link to the authorization server of the data source will be generated and returned to your product (3). That link can be used to redirect end-users to authenticate their data source (4, 5). The returned access credentials will be stored in Airbyte's internal GCP secret store (6), and a Secret ID will be returned to you at the redirect URL specified in the original request body (7).
Note: The redirect URL you provide here does not need to be registered with Airbyte or the OAuth provider. The only requirements for the redirect are that it:
- Supports HTTPS
- Receives a secret ID in the query string
- Ties the secret to the relevant connector based on the user session
Source creation
The next step is to execute a request to Create Source and include the Secret ID at the top level of the request body in a secretId parameter. (8)
When the request returns successfully, a fully functional OAuth source will have been created in the requested workspace (9) and the SourceId will be included in the API response body (10). The Airbyte Source can now be connected to any Airbyte Destination of your choosing.
Note: Using this workflow, some of the source OAuth configuration that would normally be required is not required and gets filled out by the Airbyte API based on the secret identifier you provide. To determine what would no longer be required, see the source's connector specification and look for the section delineating the OAuth information. Any request body parameter that is listed in complete_oauth_output_specification or complete_oauth_server_output_specification in the connector specification/advanced auth section will not be required if a secretId is provided in the request body.
2. Bring your own credentials to authenticate.
(click image to expand)
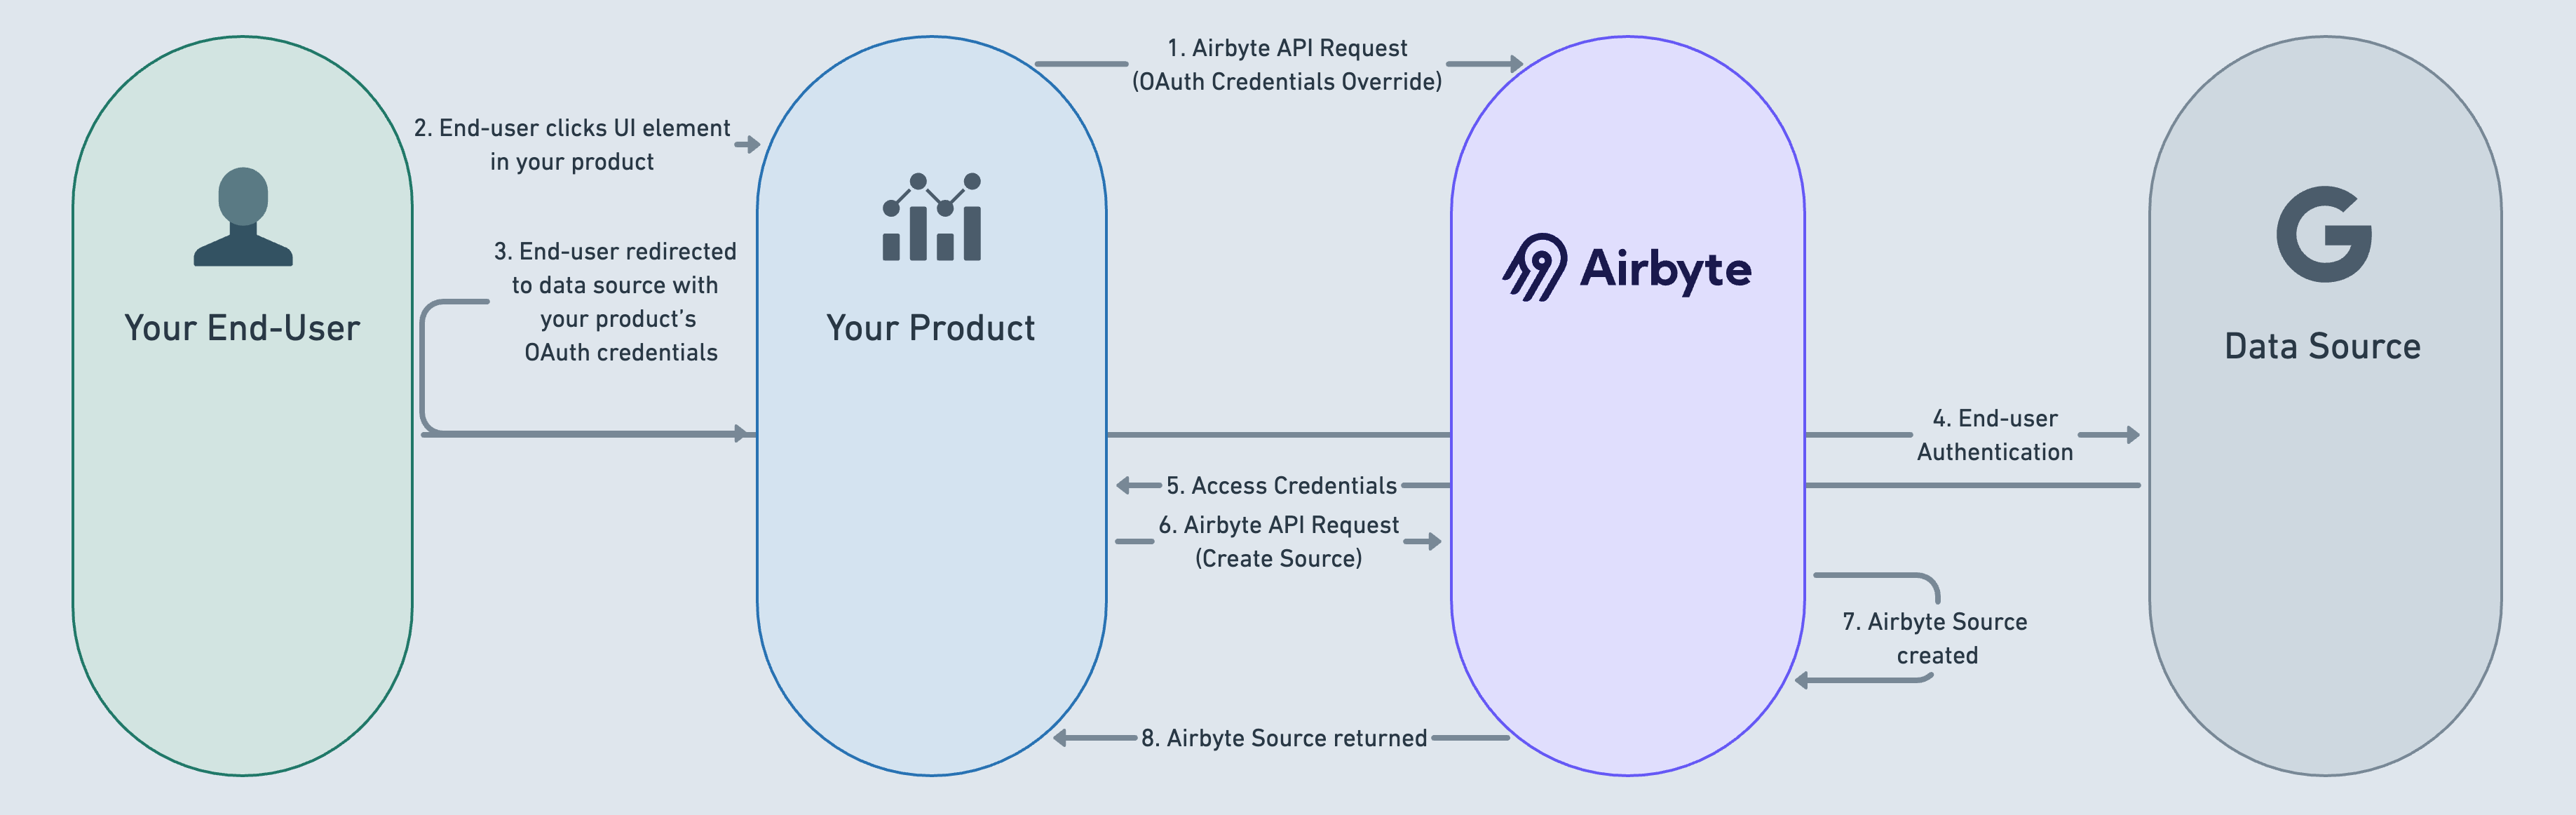
Set up your application
Create your application for the 3rd party API. Make sure it is configured to authorize a callback to https://api.airbyte.com/v1/oauth/callback.
When redirected to this endpoint, Airbyte will persist the credentials for the source, and redirect to your desired redirectURI as configured in Step (4).
Set up a Workspace OAuth Credentials Override
After creating a new workspace, you should then execute an API request to OAuth Credentials Override for the specific type of OAuth source to be used in your customer’s workspace (Google Ads, Hubspot, etc) (step #1 above).
Initiate Source OAuth
A user clicks a UI element in your product (step #2 above). An example could be a button titled "Integrate Google Ads account". You build a redirect URL to the data source and redirect the user to the data source using your own OAuth credentials (3). The end-user authenticates their data source (4). The data source returns access credentials to you (5), which you then store (access token, refresh token).
Source creation
The next step is to execute a request to Create Source and include the appropriate credentials formatted according to the source specification (6).
When the request returns successfully, a fully functional OAuth source will have been created in the requested workspace (7) and the SourceId will be included in the API response body coming back to you (8). The Airbyte Source can now be connected to any Airbyte Destination of your choice.
For that specific workspace and source definition, Airbyte Cloud will now use your OAuth credentials when doing anything OAuth-related instead of the Airbyte-owned credentials.